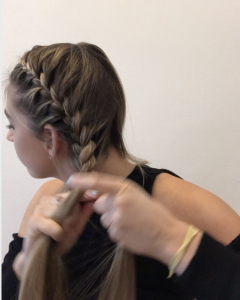
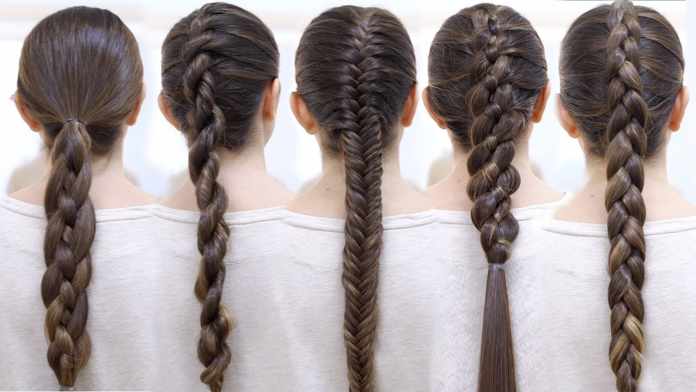
The braids tied at the back are difficult to put together by yourself… But if you learn the basic method, anyone can connect! Lecture on how the hair crosses, using a photo of the back view. If you have a problem of sagging or a problem of becoming unkempt, please refer to it once. Let’s try a simple back braid arrangement that you can do at home. In this article, we read about How to braid hair?
Table of Contents
[You can do it yourself! ] How to braid behind
If you get the hang of it, you can do it easily! Check your hand movements and try TRY.
-
First, divide into three bundles
It is divided into three parts: left (blue), middle (pink), and right (green). The point is to separate the hair so that the amount of each bundle is the same.
-
Cross the left bundle in the middle
Layer blue on top of pink in the middle and cross. At this time, hold the green and blue on the right separately with your palm and fingertips so that they do not form the same bundle.
-
Cross the right bundle in the middle
Now cross the green bunch on the far right over the blue bunch. Keep the pink and green bundles separate.
-
Cross the bundle on the left end in the middle
As you knit, the bundle at the end will shift from the initial position. The one on the far left is pink, so let’s cross the pink with the bunch of greens in the middle.
-
Cross the bundle on the far right in the middle
Next, cross the blue on the far right over the pink in the middle. Let’s repeat this until the tip of the hair.
Complete!
Knit to the ends of the hair, tie it with rubber, loosen it, and you’re done!
The left and right will change, but the order of stacking will not change, so if you stack them in the order of blue-green → pink, it’s OK!
Tips on how to loosen
- When pulling out the top hair, randomizing the intervals will give a sense of innocence.
- You can prevent mistakes by pulling it out little by little with your fingertips.
[Five methods] Measures to be taken when braiding in the back causes “sagging”
- Wrap the base loosely
- Hair bundles to be woven are even
- Make a ponytail and then make a braid
- After tying it tightly
- Keep firmly with styling products
A common problem with braids is sagging. Make your hair easier to handle and knit it tightly to prevent it from sagging!Prepare the base before braiding and aim for a beautiful finish.
-
Wrap the base loosely
Curly hair is easier to get entangled with than straight hair and is less likely to collapse. Since it will be knitted firmly, the winding method is appropriate and OK! Even if you do not wind all of them, it will be easier to tie them if you wind them to some extent.
-
Hair bundles to be woven are even
If there is a bias in one bundle, such as more on the right and less on the left, the unity will be worse. By dividing it as evenly as possible, it will be well-balanced and less likely to sag when stacked.
-
Make a ponytail and then make a braid
If it collapses from the beginning, tie it together before braiding. Even if you knit it tightly, the ponytail and braid will give you a cute impression.
-
After tying it tightly
If you loosen the stitches from the beginning, it will easily sag. The correct answer is to knit it tightly and then pull it out little by little with your fingertips.
-
Keep firmly with styling products
Once you have the ideal braid, apply a hairspray for a long-lasting styling. A spray with a glossy effect will give you a more beautiful finish. It is also possible to let the wax blend in before knitting.
[Hair Arrangement] The technique you want to use when braiding behind!
There are many variations of arrangements using braids! You can enjoy many combinations if you change it according to your coordination.If you master the basic braids, your daily hair arrangement will surely be exciting.
Roughly braid x ribbon for CUTE
Braids that are firmly woven from the top are intentionally not evenly divided into bundles to give them looseness. If the thickness of the bundle is different, it will easily crumble, so if you apply wax before knitting, it will be ◎. Finally, attach the ribbon to complete the cute arrangement.
Nowadays braid ponytail
Make a ponytail at a high position and then braid. If you knit it tightly and then loosen it with your fingertips, you can get a good sense of innocence. The swaying movement of the ponytail gives an active impression!
One habit is cute! Two-tiered braid pony
Half up just below your ears and tie the rest of your hair. If you braid about half of the bundle, tie it with rubber and lightly wrap the ends of the hair to make it more cute. Loosen the braid part firmly.

If your hair is short, take it in half-up
Bob’s hair isn’t long enough and it’s quite difficult to braid behind him … Then why not take it in half-up? Roughly remove the hair from the top of your ears and make a braid. If you loosen it boldly, you will have a braid with a strong presence.
Knit with Bandana and look like an advanced player
First tie them together and then wrap the bandana to hide the rubber. At that time, make sure that only one of the bandanas hangs down for a long time. All you have to do is braid with Bandana. If you hide the rubber on the ends of the hair with a bandana, you will feel like you are in it!
[Other] Check out the popular braid arrangement method!
“Braid” that can be loved and become a girl. After mastering how to make it behind you, why not try other arrangements? The following article features the latest hair arrangements that add a touch to braids. If you get the hang of it, it’s easy to do ♪ Let’s incorporate it into your usual style and update the cuteness!
Also read: how much does it cost to build a house


